Monday, August 29, 2011

Apple Chicken Sausage and Spinach Salad

What you'll need:
For the sausage:
Cast iron skillet
1 package of Aidell's chicken apple sausage
1 Bud Light
Fennel seeds
Tabasco sauce
Dale's seasoning
1-2 tsp cranberry juice
Salt
Pepper

For the salad:
Spinach
Cucumber
Cherry tomatoes

Dressing:
1 tbsp dijon mustard
2 tsp lemon juice
1tbsp extra virgin olive oil
2-3 shakes of rice wine vinegar
Salt
Pepper

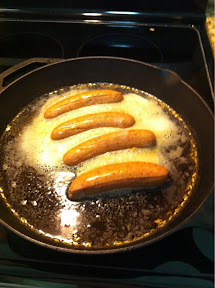
1. Boil the sausages in a Bud Light, cranberry juice, fennel, Dale's, a few shakes of Tabasco, salt, & pepper mixture. Boil 5 minutes on each side. Boiling the sausage will make it juicy.


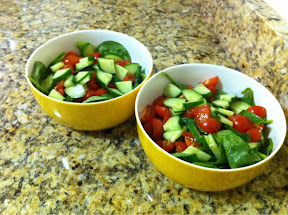
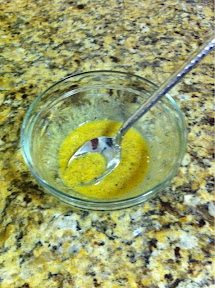
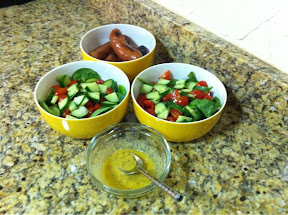
2. Slice the ingredients for the salad and prep the dressing. Keep on the sideuntik you're ready to eat.


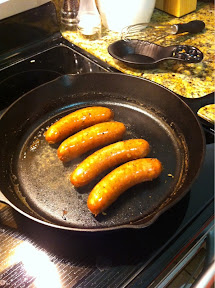
3. Pour the liquid out of the skillet. Heat it up and place sausages on to get a crispy, brown skin.


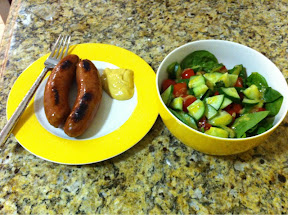
4. Finished meal; serve with Dijon sauce for dipping.


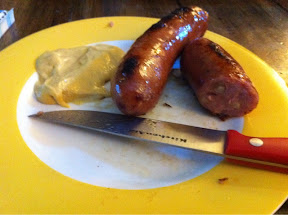
5. Here's a photo of the sausage sliced through. You can see the pieces of apple inside.


- Posted using BlogPress from my iPad

Beef, Veggie, and Noodle Stir Fry

What you need:
Wok pan


Garlic powder
Ginger powder
Spicy peanut sauce
Rice wine vinegar
Wok oil
Sesame oil
Low sodium soy sauce
Spaghetti


Sliced red onion
Carrots
Cucumbers
Garlic


Beef tenderloin cut into pieces

1. Heat up the water to cook the pasta. Undercook by 1-2 minutes according to directions on box. While the pasta is cooking, heat up the wok pan and add in some wok oil. Cook the onions on medium heat stirring occasionally and covering with the lid.


2. On a cast iron skillet, sear the meat on both sides & set aside to rest.


3. When the onions begin to caramelize add the sliced carrots. Pour in some dry vermouth or white wine to help steam the carrots and onions. Stir and cover; let cook for 3-4 minutes.


4. Add in the cucumber and garlic.


5. Stir in the cooked pasta. Add garlic powder, ginger powder, spicy peanut sauce,
rice wine vinegar, sesame oil, and low sodium soy sauce.


6. Stir in the cooked meat and serve.


Posted using BlogPress from my iPad

Italian Breakfast Casserole

I made this casserole one Saturday morning to surprise Kenny. I used what I could find in our kitchen. It turned out to be a great, fresh tasting casserole.

What you need:
1 glass 5 x 5 pan
Cooking spray
1 can of uncooked croissant dough
8-10 cherry tomatoes (diced)
1 lb. Italian sausage(I used hamburger meat but the Italian sausage would give it even better flavor)
Fresh rosemary (chopped)
Fresh basil (chopped)
1 container of cream cheese (melted)
Parmesan (shredded)
1/2 a white onion (chopped)
2-3 cloves of garlic (chopped)
3 eggs

1. Spray your pan with cooking spray and line with 4 croissant dough pieces.


2. Cook the onions in a nonstick skillet until they are caramelized.


3. Cook the meat and add to the bowl with the onions.


4. Add herbs, tomatoes, parmesan, and garlic to the bowl. Stir to combine.


4. Crack the 3 eggs into the bowl and add the melted cream cheese; stir to combine.


5. Pour the mixture into the croissant lined pan.


6. Sprinkle about 1/4 c of parmesan over the mixture. Top with training croissant dough.


7. Cook in the oven on 375 degrees for 30 minutes or until the croissants are golden brown.


8. Yum! Enjoy!


Posted using BlogPress from my iPad

Friday, June 10, 2011

Bruschetta

Bruschetta is one of my favorite things to make and to eat. It is simple, fresh, and a constant crowd pleaser. Since moving into our house we have a small herb garden. Somehow our basil is growing out of control (good job Farmer Kenny) so I am constantly thinking of ways to use it. I used to use the tubes of basil but find that fresh tastes much better, especially when it's growing in your back yard.

Ingredients:
10-13 fresh basil leaves (depending on their size)


1 container of cherry tomatoes
Freshly grated Parmesan cheese


1 loaf of French bread
Olive oil
Salt
Pepper

1. Cut the stems off the basil.


2. Chop the basil and put into a bowl.


3. Wash the tomatoes. Slice them into fourths and put them in the bowl with the basil.


4. Grate Parmesan cheese over the tomatoes.


5. Stir to incorporate. Add salt, pepper, and olive oil and stir again. Top with the remanding Parmesan in the grater.


6. Now for the toasts. Set the oven to 250 degrees F. When you buy your loaf of bread sometimes they will slice it for you in the bakery. I would suggest doing this if you're in a time crunch. Make sure it's sliced thick. When I went to buy my bread no one was in the bakery so I had to slice it myself. Slice the loaf in half to get it started.


7. Slice the bread into 1 inch slices. Make sure to use a serrated bread knife.


8. Line 2 cookie sheets with aluminum foil. Place the bread on the cookie sheets.


9. Fill a bowl with olive oil, salt, and pepper. Brush on the seasoned olive oil with a non-stick brush (like the one picture below).


The bread should look like this.


10. Toast the bread for 17 minutes. Place on a platter.


11. You can make the toasts ahead and serve them cool or toast closer to the time of your party and serve them warm. Put the bowl of tomato mixture out next to the toasts with a spoon. This way your guests may spoon their own amount of tomatoes on the toast. If you do it ahead of time the bread gets a little soggy.

-Posted using BlogPress from my iPad

Turkey, Cream Cheese, and Pickle Bites

This recipe is one from my parents. They used to make this all the time when they were entertaining or bringing an appetizer to a party. The combination may look odd but honestly tastes delicious! I've had many people who don't care for pickles love this dish! I think it's the cream cheese. :)

Ingredients:
I jar of Kosher pickle spears


1 pound of deli turkey sliced thick (the "sliced thick" part is important!)
2 containers of softened cream cheese (you won't use all of the second package but you'll need more than one). My mom swears non-fat or reduced fat does not work as well, but you can try it.


Directions:
1. Slice 5-6 pickle spears in half. Pat them dry with a paper towel.


2. Smear a large amount of cream cheese on a piece of turkey. If the turkey begins to rip try doing 2 pieces at once. That means your turkey is too thin. Adding a little bit more cream cheese helps as well.


3. Place a pickle length wise with the turkey. If it's too short add another and trim it to fit.


4. Roll it up and place it seam side down on a cookie sheet. When you're done it should look like this.


5. Depending on how much time you have, place in the fridge or freezer. The colder the pickle roll ups are the easier they are to slice. You should do this for a few hours and can even leave in the fridge overnight.

6. Slice the roll ups about 1 inch thick. Cut off the "ugly ends" as my mom calls it. Don't worry if you feel like you're wasting a lot... I save the ugly parts to eat later. Here is what my pile looked like.


7. Place the pretty, sliced pieces on a platter. Cover and keep in the fridge until you're ready to serve. You can serve with toothpicks or eat them with your fingers.


Posted using BlogPress from my iPad